Easy Odoo Setup
Easy Odoo Setup is the environment initialization suite within Assista IDE. It automates the technical overhead of Odoo project preparation by consolidating source acquisition, environment isolation, and runtime configuration into a managed workflow.
Overview
The setup utilities are located in the Odoo Menu within the activity bar. These tools can be used independently or sequentially to manage the Odoo development environment.
1. Source Code Acquisition
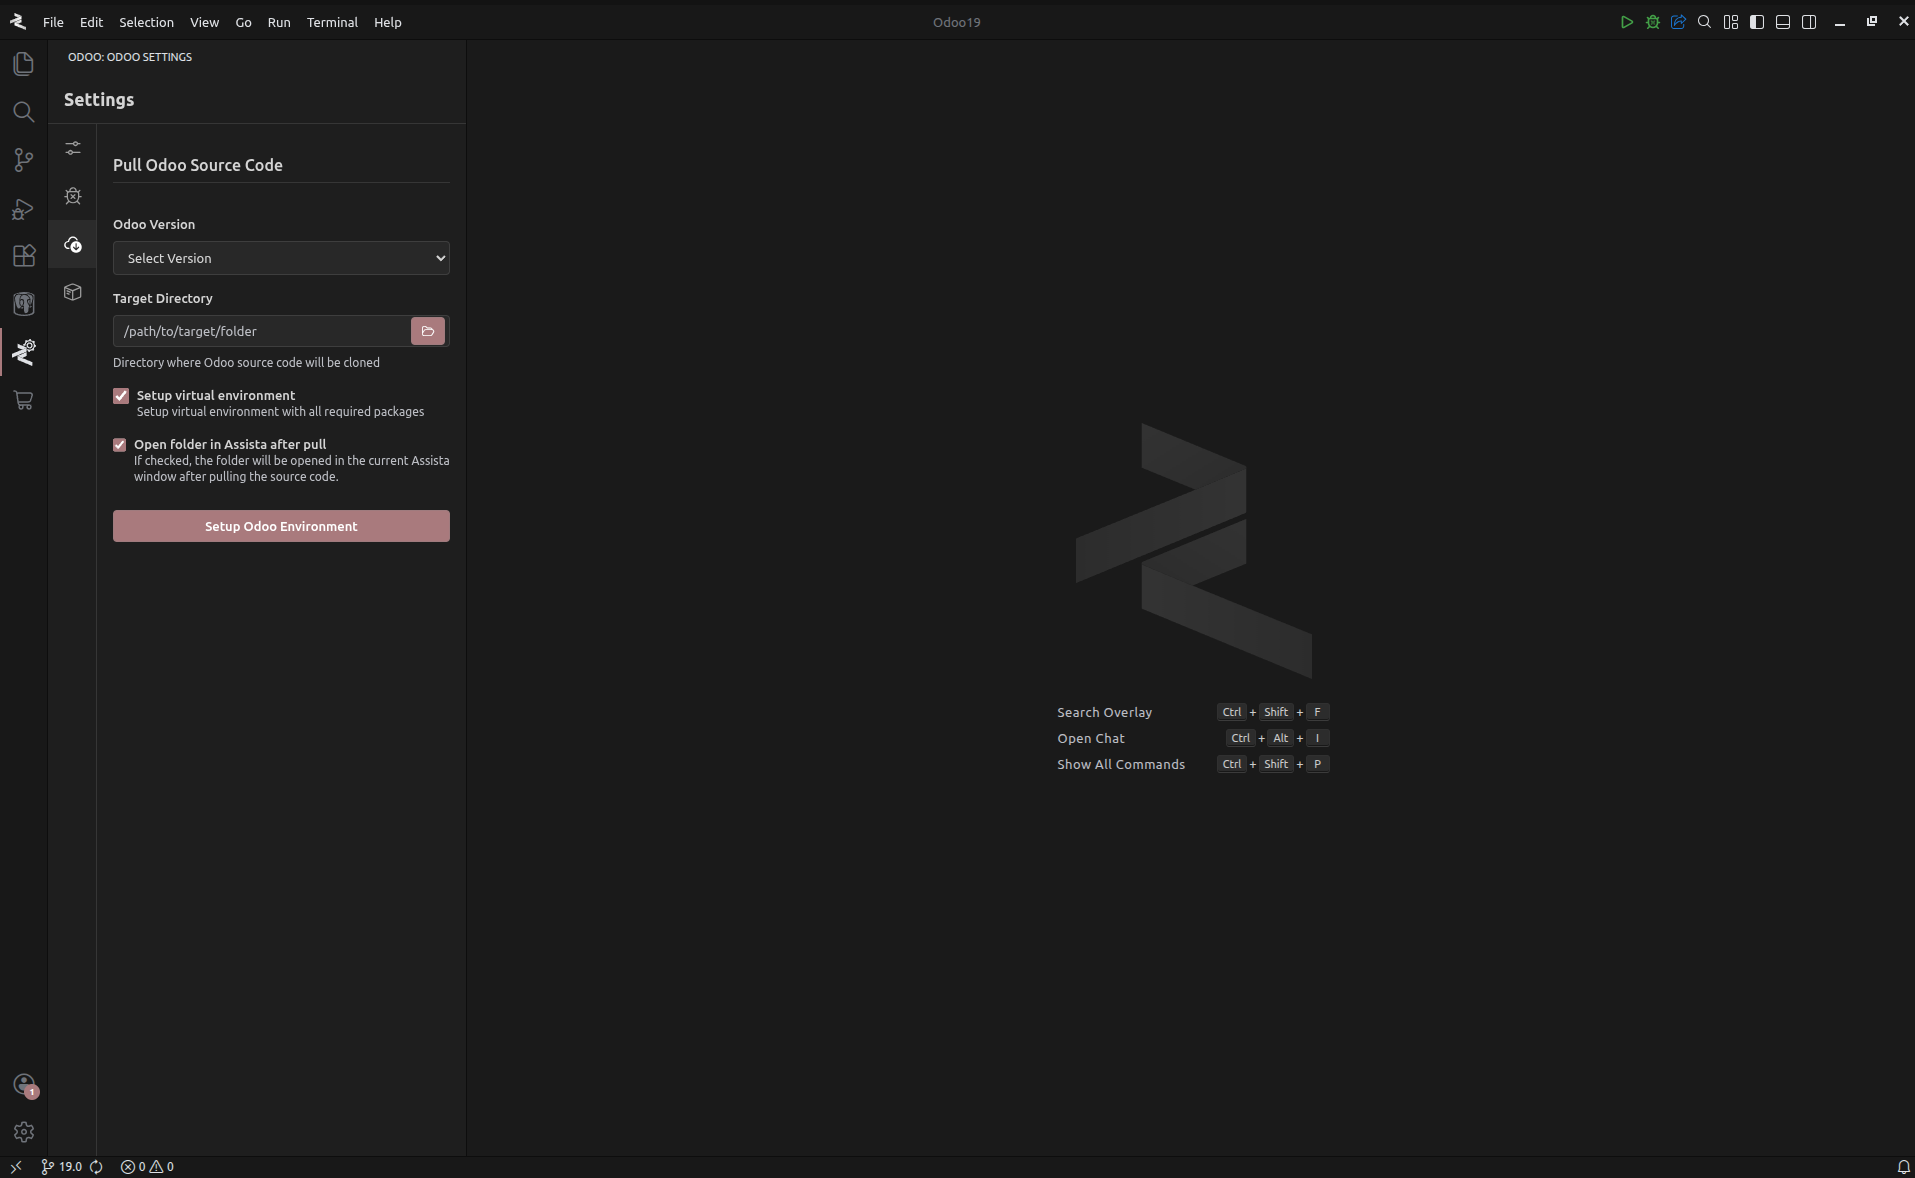
The Pull Odoo Source Code utility automates the cloning of Odoo core repositories.
- Version and Path Specification: Users specify the target Odoo version and the local destination directory.
- Embedded Environment Initialization: Optionally enables the Setup Virtual Environment flag to trigger immediate venv creation and dependency installation upon clone completion.
- Project Auto-Mount: Enabling Open folder in Assista after pull automatically mounts the new directory into the current workspace.
Technical Prerequisites
Successful cloning and environment setup require:
- Git and Python pre-installed on the host system.
- All Odoo-specific system-wide packages (e.g.,
libxml2,wkhtmltopdf) configured in the OS. - Verification of Python version compatibility for the specified Odoo release.
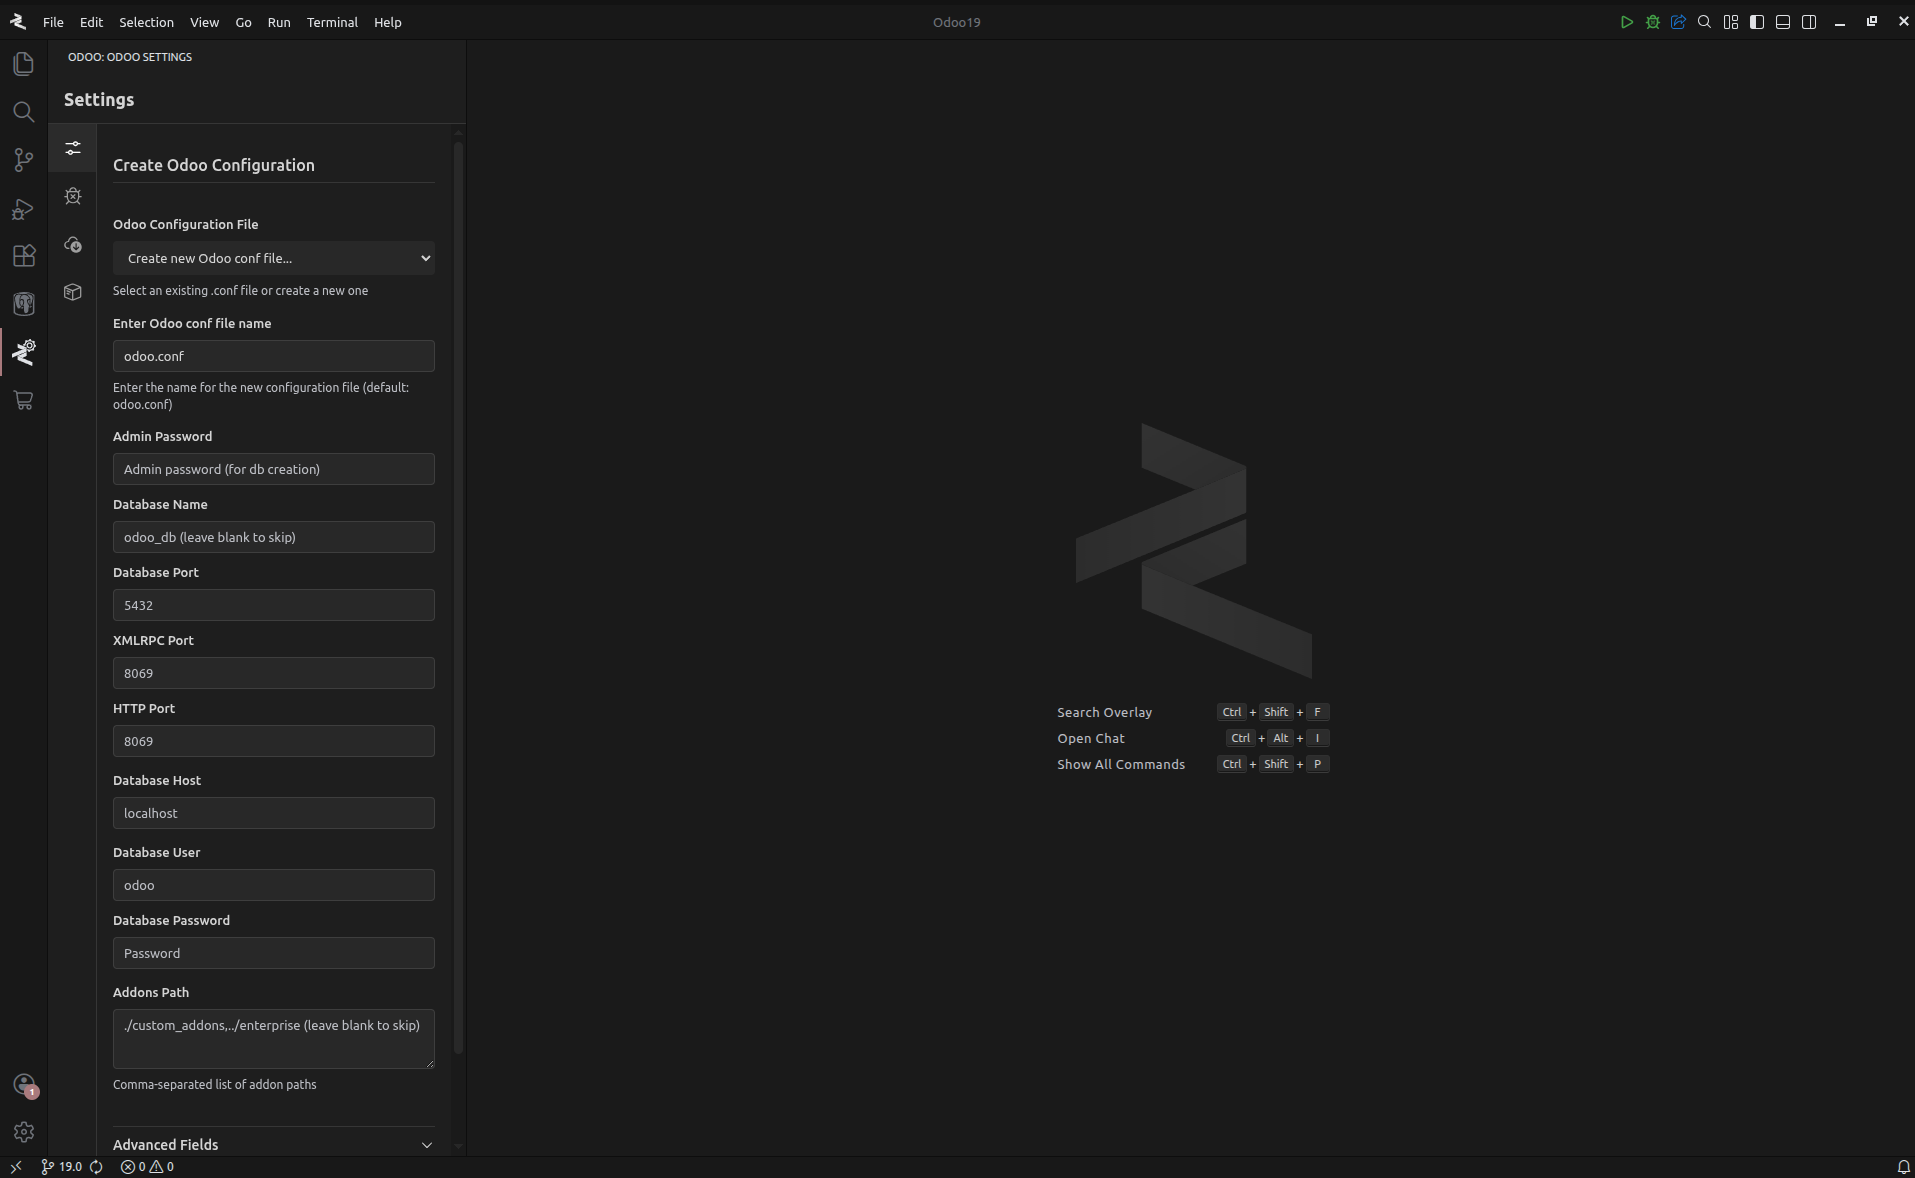
2. Configuration Management (odoo.conf)
The Create Odoo Conf File utility provide a graphical interface for managing Odoo server parameters.
- Initialization & Editing: The interface supports creating new
.conffiles or editing existing configurations detected within the project root. - Primary Parameters: Input fields for PostgreSQL credentials, XML-RPC ports, and addons paths.
- Advanced Parameter Injection: The "Advanced Fields" section allows for the direct entry of any valid Odoo configuration key-value pairs.
- Automated Defaults: Assista IDE populates required system parameters by default to ensure environment stability.
3. Virtual Environment Automation
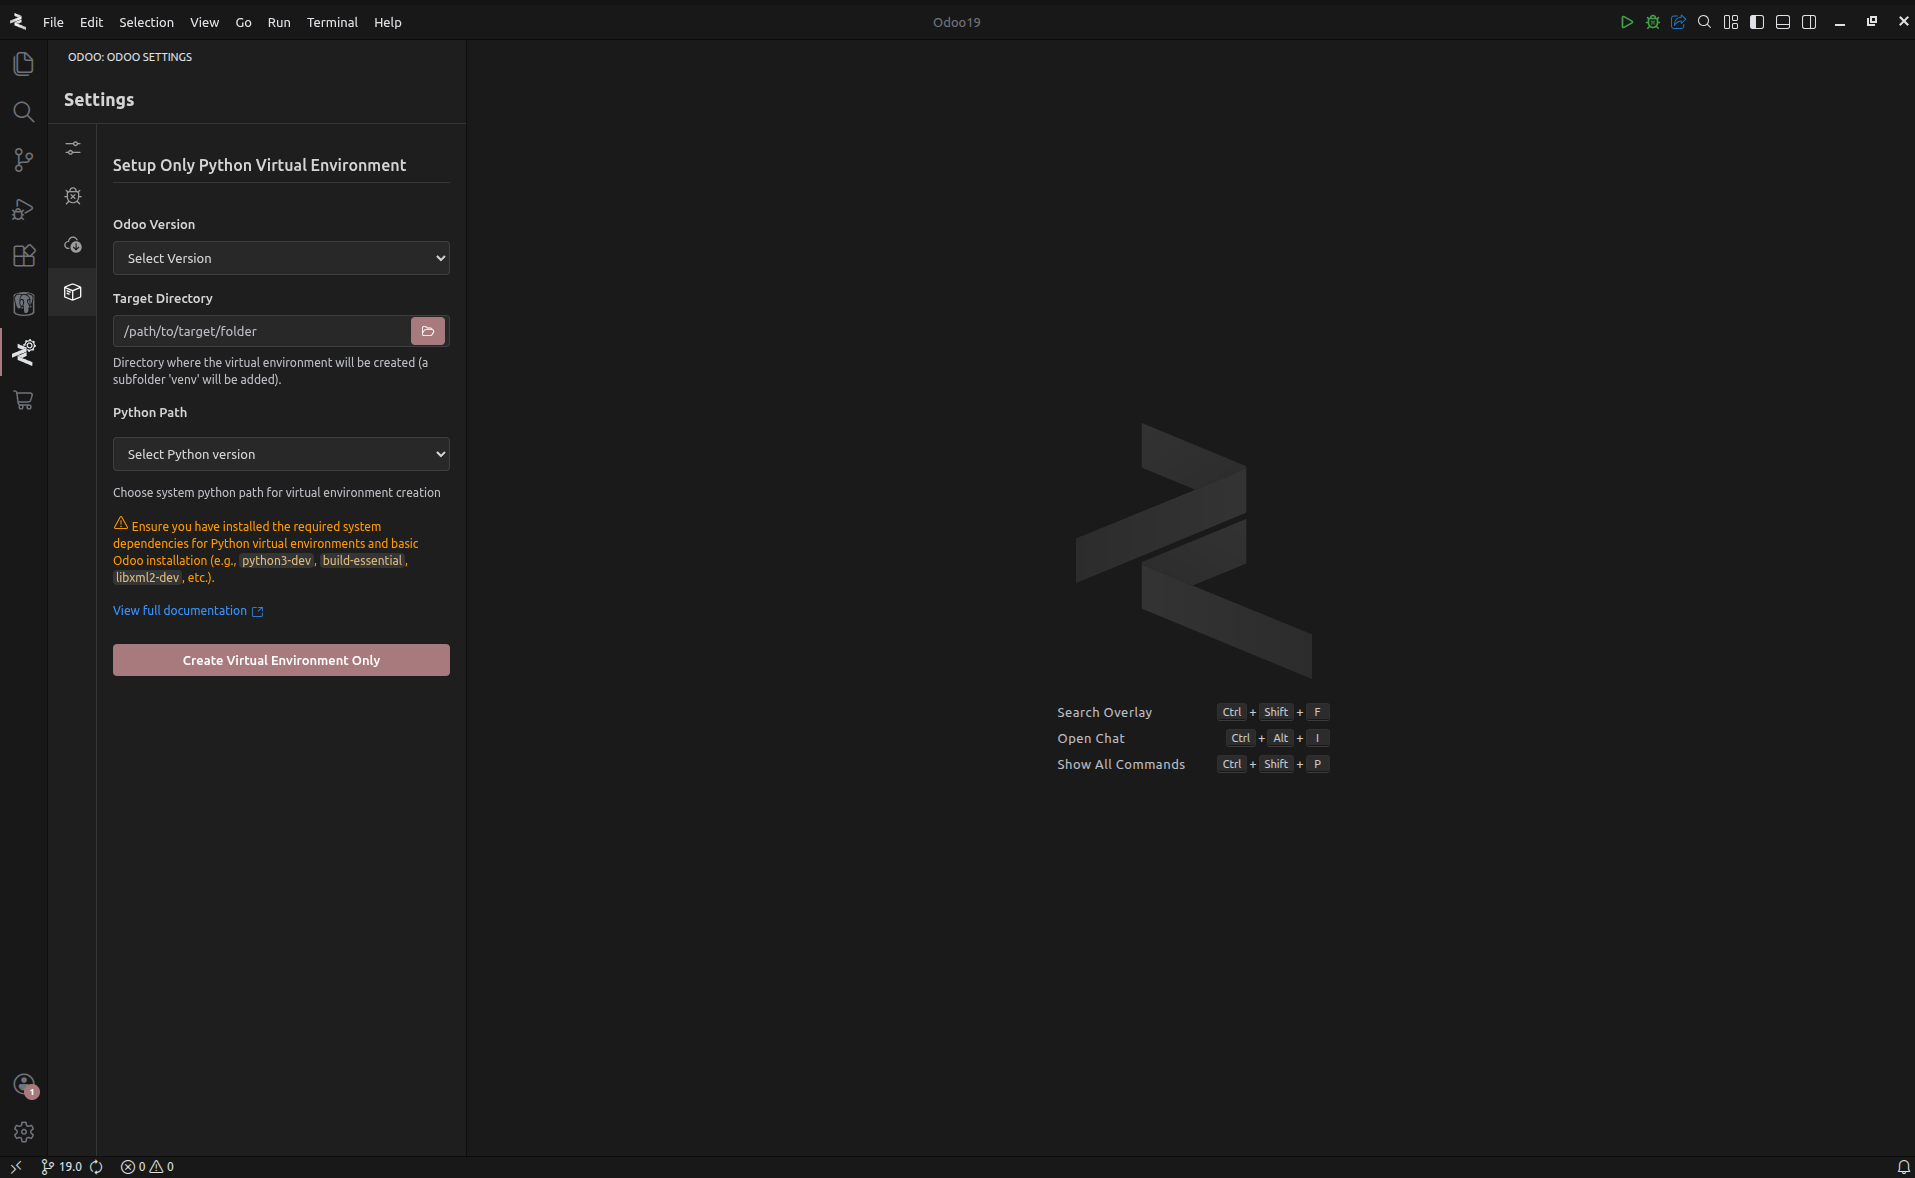
For standalone environment management, the Virtual Environment Only Setup utility isolates Python dependencies.
- Directory Mapping: Define the target Odoo version and the specific isolation directory.
- Interpreter Selection: Map the environment to a specific system Python interpreter.
- Automated Dependency Build: The IDE handles the creation of the
venvand executes recursivepip installfor all Odoo requirements found in the source.
4. Debugger Configuration
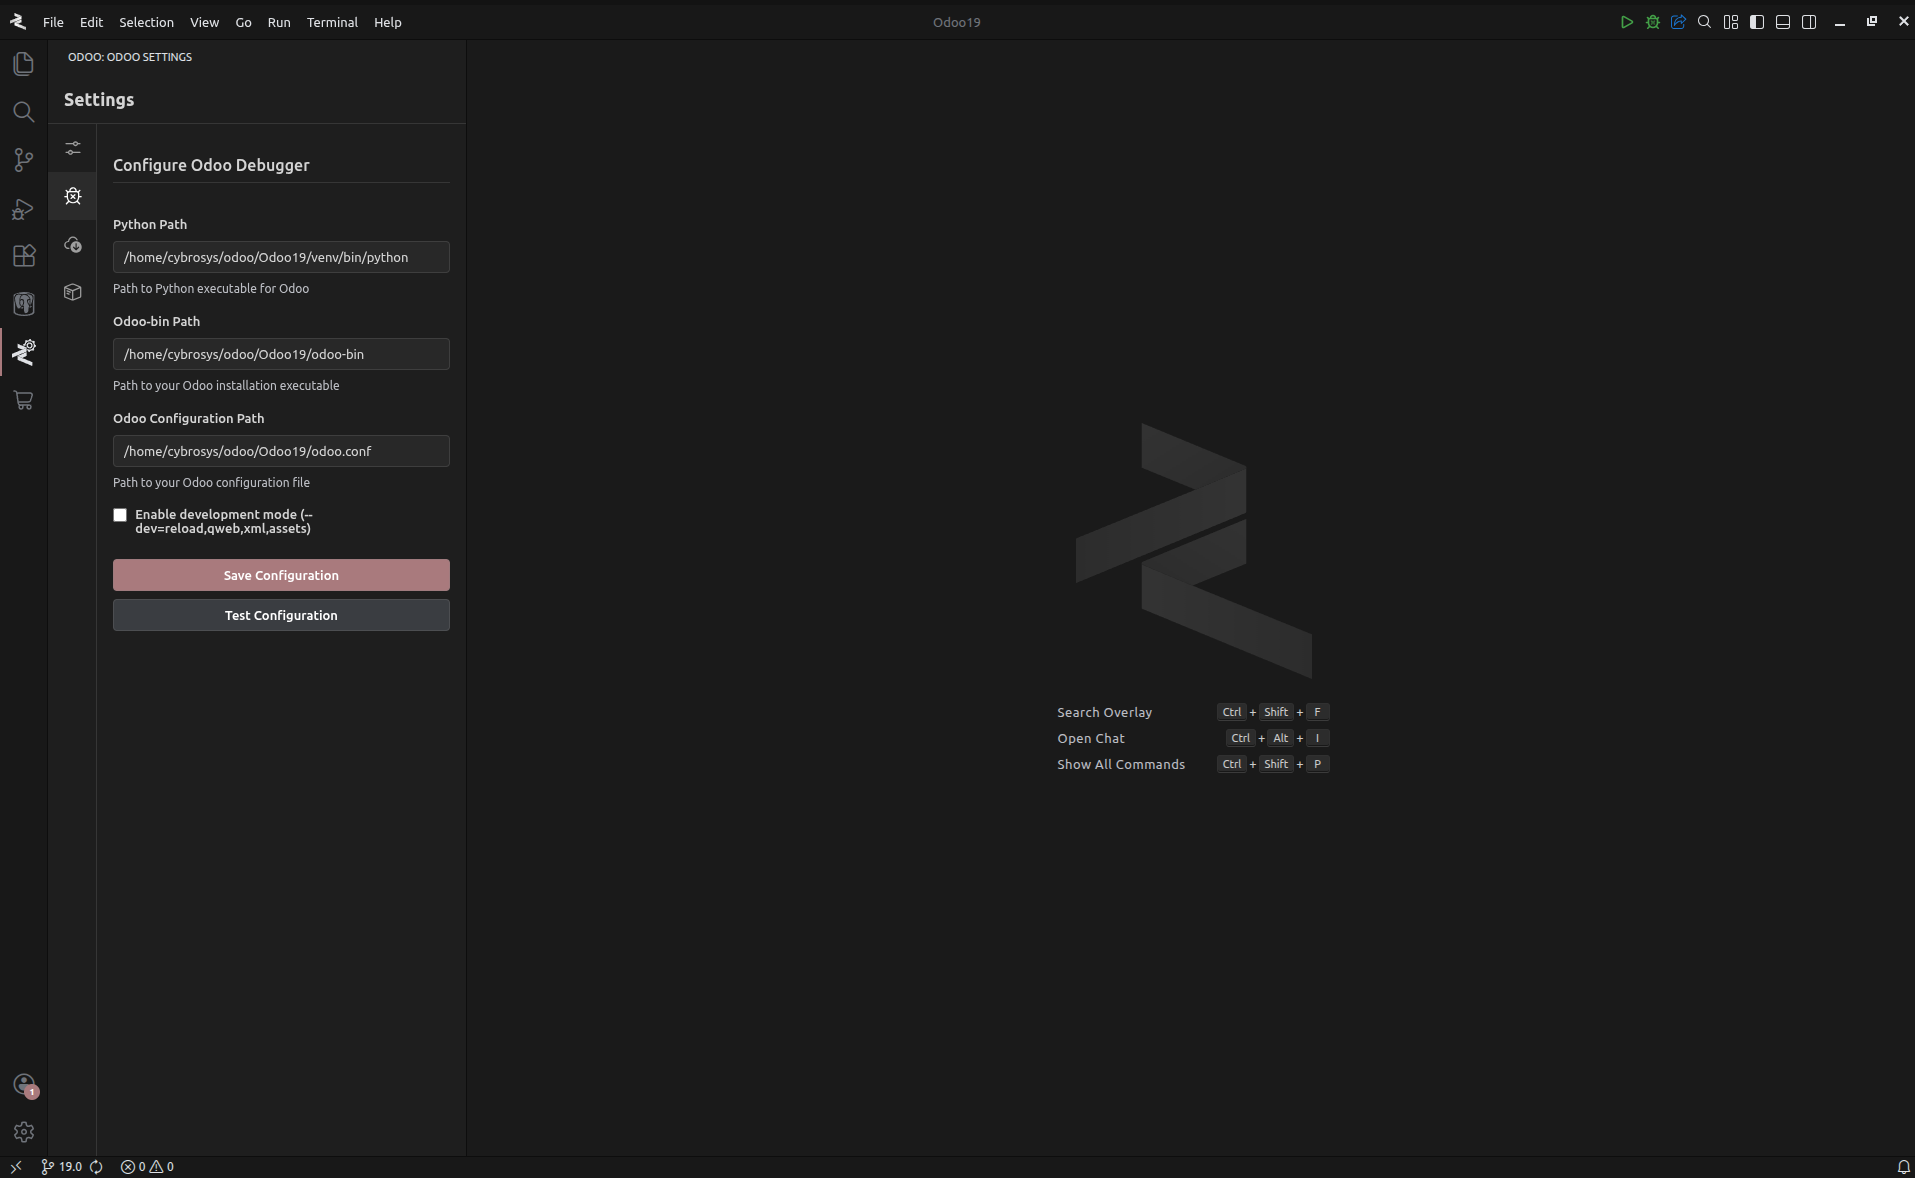
The Configure Debugger utility generates the execution profiles required for the IDE's debugging engine.
- Path Mapping: Define absolute paths for the Python Interpreter, the Odoo-bin executable, and the active Configuration file. The IDE pre-fills these fields if local configurations are detected.
- Development Flags: Enabling Development mode appends the
--dev=reload,qweb,xml,assetsflags to the runtime execution string. - Configuration Validation: The Test Configuration utility verifies path integrity before finalizing settings.
- Execution Profile Generation: Saving the configuration generates or updates the
launch.jsonfile, enabling the IDE's unified debug control.
Onboarding Assistant
The Odoo Onboarding assistant is a continuous wizard that guides users through the sequential execution of the setup tools described above.
Resetting Onboarding
To restart the onboarding flow for a new project, navigate to File -> Close Folder. This returns the IDE to the initial welcome state, providing access to the Onboarding Setup Assistant.
For technical guides on initial system-level requirements, refer to the Prerequisites Guide.