

Assista IDE features
Assista IDE brings together an AI agent, environment setup, Odoo code tools, module review and sharing tools. Each section below says what you can do and links to the detailed page.
Assista Coder
Describe what you need and Assista Coder writes and edits Odoo code with you. It looks up models and fields in your project before it writes, and shows every change as a diff you accept or reject.
Open it with Ctrl+Alt+I (Cmd+Ctrl+I on macOS). Read more.
- Ask in plain language. Say what you need, for example "add a computed margin field to sale.order". You do not have to name the model, field or file.
- It reads your project first. Assista Coder has Odoo-aware tools. It looks up models and fields, searches your code and checks modules, so the code it writes fits your project.
- You review and accept. Changes show up as a diff in your files. Keep the ones you want. In Chat mode it only reads and explains and never edits. In Agent mode it can edit files and run commands.
Your prompt and the relevant code are sent to the AI model provider to produce a response. AI usage is paid from your prepaid Assista credit, or from your own provider key if you add one in Settings.
One-click environments
Choose an Odoo version and a folder. Assista downloads Odoo, creates a virtual environment with the Python packages that version needs, and adds a ready-made debug configuration. For PostgreSQL and system libraries, it shows you the commands to run for your operating system. Read more.
- Choose your Odoo version. Pick a version (Odoo 11 through 20 are listed) and the folder to put it in.
- Assista sets up Python. It downloads Odoo, creates a virtual environment and installs the Python packages that version needs.
- Run it with the debugger. An Odoo Debug configuration is added to your project. Run it and Odoo starts with the debugger attached.
Code templates
Type a keyword such as odoo form view to insert a Python or XML snippet. Right-click a folder to create a module, a model, a view, a report, an OWL component or an access right. The generated code follows your Odoo version (18, 19 or 20).
- Type a keyword. In a Python or XML file, start with
odooand what you need, for exampleodoo form vieworodoo abstract model, and pick the snippet. - Create a module from the menu. Right-click a folder, choose Assista Odoo, then Create Odoo Module. You can pick a basic, advanced, OWL, systray or website-theme module.
- Add single files. The same menu creates one file at a time: a model, a view, a security file, a PDF or HTML report, or an OWL component.
Read more and see the Python snippets and XML snippets.
Odoo-aware editing
As you type, Assista IDE suggests models, fields, methods, XML IDs, templates and widgets that exist in your project. Press F12 or Ctrl+Click on a name to jump to its definition, from XML to Python and back. You can also turn on warnings that check your code against Odoo's coding guidelines. Read more about suggestions and coding standards.
Find in Files
Press Ctrl+Shift+F (Cmd+Shift+F on macOS) to search your whole project or one folder, filter by file type and preview each match before you open it. Read more.
Review a module
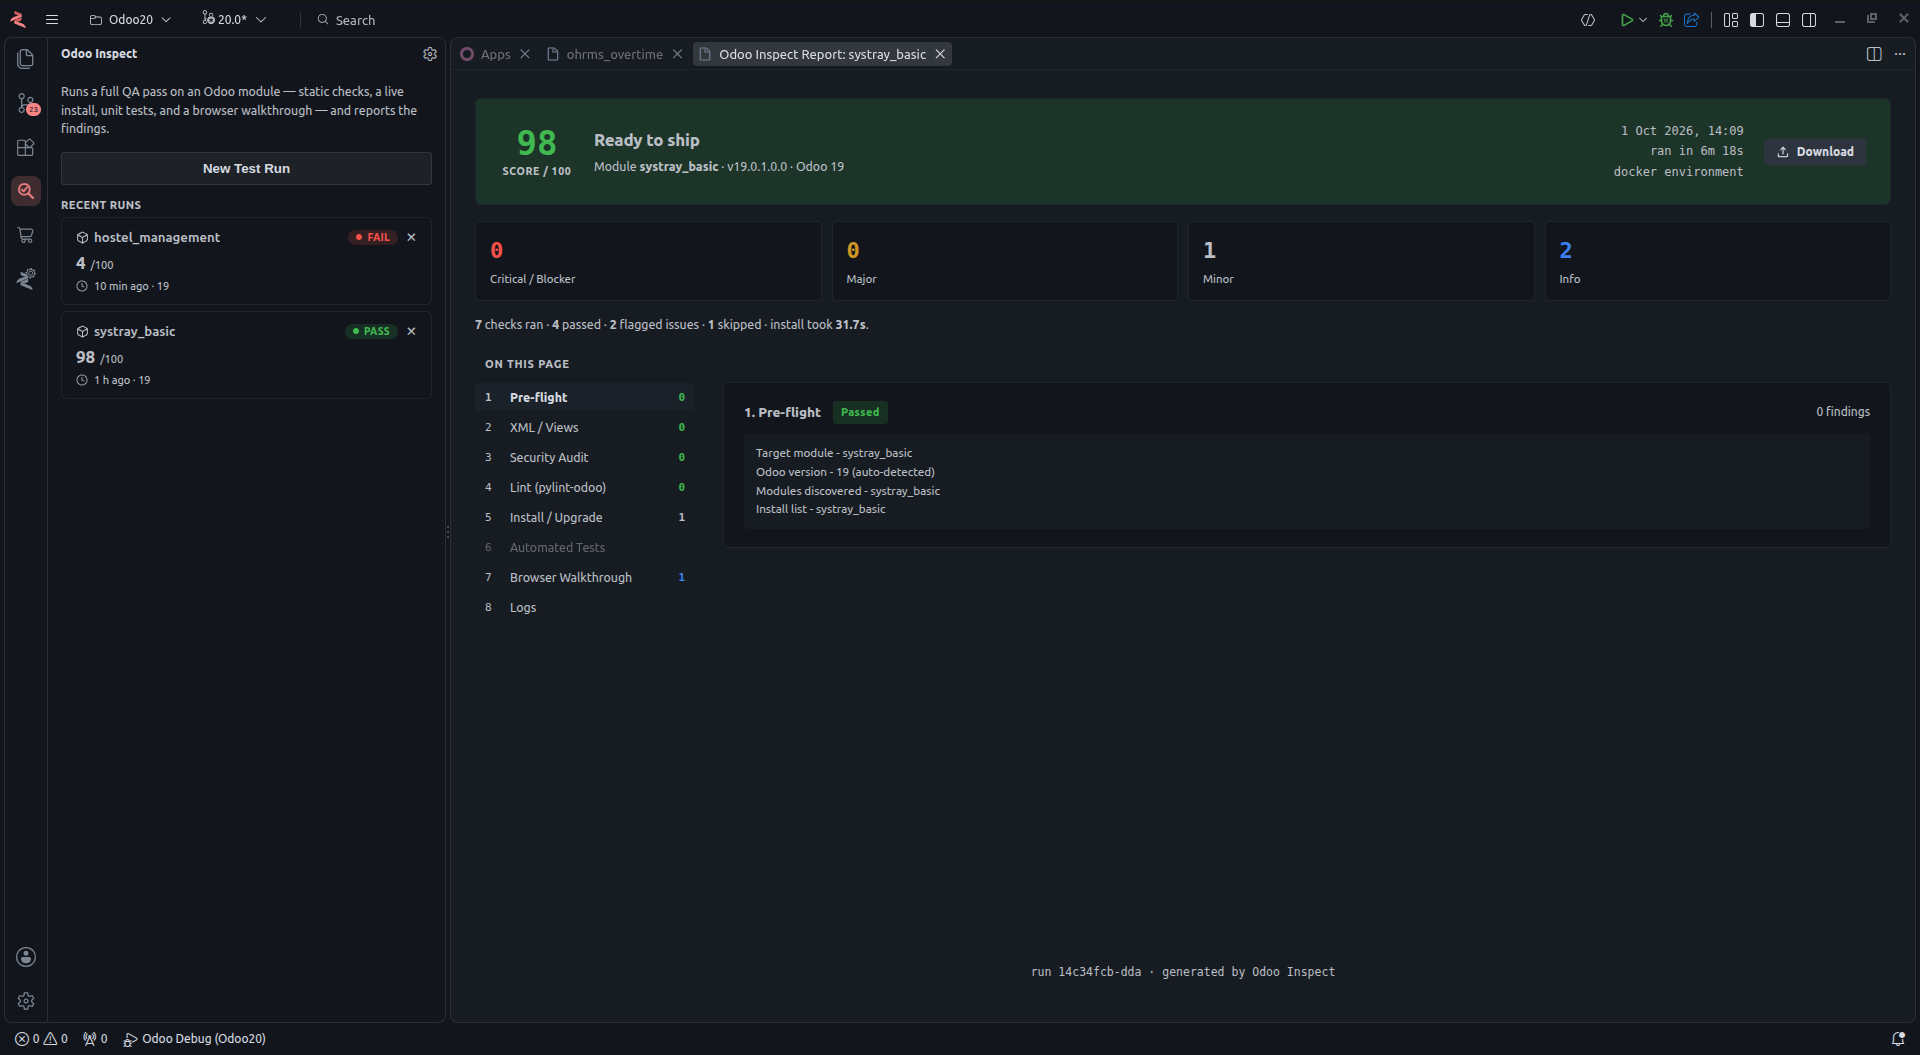
Module Reviewer, called Odoo Inspect inside the IDE, checks a custom module and produces a report. Right-click a module folder and select Run QA Check…, or open the Odoo Inspect panel in the side bar and start a new test run.
Choose the checks
Install and upgrade always run, because every other check needs the module installed. Turn the others on or off, or select Full or Fast to pick a preset.
| Check | What it does |
|---|---|
| Code quality & structure | Reads every file in the module and checks it against Odoo conventions. It also covers XML validation, security rules and pylint. |
| Automated tests | Runs the module's own unit and integration tests. |
| Browser walkthrough | Clicks through the module like a user and takes screenshots. |
| Screenshot gallery | Saves a full-page screenshot of every view the walkthrough visits. |
| Performance flags | Profiles the install and upgrade with cProfile. It slows the run, so it is off by default. |
| Generate sample test data | Creates demo records when the module has nothing to test against. It applies to sandbox runs only. |
The Odoo version is detected from the module. You can also choose 17, 18 or 19.
Choose where it runs
| Environment | What happens |
|---|---|
| Isolated sandbox | Starts a disposable PostgreSQL and Odoo pair in Docker and discards it after the run. This needs Docker. |
| Your local Odoo server | Installs the module on the Odoo you already run, using its real database. Assista reads the host and port from your odoo.conf, asks you to confirm the server and database, and signs in with the Odoo login you save in the panel. The login is kept in the IDE's secret storage, not in your settings. |
Your local server keeps the changes
Installing or upgrading the module on your own server is permanent. Use a development database. Turn on Safe mode to open and fill forms without saving them, and to skip the Point of Sale flow.
Settings for the local server are under Odoo Inspect in the settings: the path to your odoo.conf, a database name for when the conf names none, and a read-only option. Automated tests are not available for a local server that was not started with tests enabled.
Read the report
The first run prepares its environment, which includes downloading Docker images and a browser. Run Odoo Inspect: Prepare Environment to do this ahead of time, or Odoo Inspect: Doctor to check that your setup is ready.
The report ranks findings as blocker, critical, major, minor or info. Findings also appear in the editor's Problems list. Save the report as HTML, Markdown, PDF or a ZIP file. The checks run on your machine and use no AI tokens. Each report keeps the server log of its test run. Module Reviewer needs Docker, or your own dev server.
Module marketplace
Search Odoo modules by name, publisher, version or category and download them into your project, with their dependencies if you want. Read more.
- Search for a module. Open the Odoo Marketplace panel in the side bar and type a module name.
- Filter. Narrow the list by Odoo version, category or publisher.
- Download it. The module is downloaded into your workspace from its GitHub repository. Tick Download dependencies and the modules it depends on come with it.
Local URL to public
Turn your local Odoo into a public link for demos and webhook testing, then stop it when you are done. Read more.
- Choose the port to share. Make sure Odoo is running on your computer. Click Deploy in the title bar and enter its port, for example
8069. - Get a public link. A moment later you get a temporary HTTPS link that ends in
trycloudflare.com. Anyone with the link can open your local Odoo. No account and no router settings are needed. - Share it, then stop it. The link is random and changes each time you start it. Select Stop Forwarding and it stops working.
Built-in browser
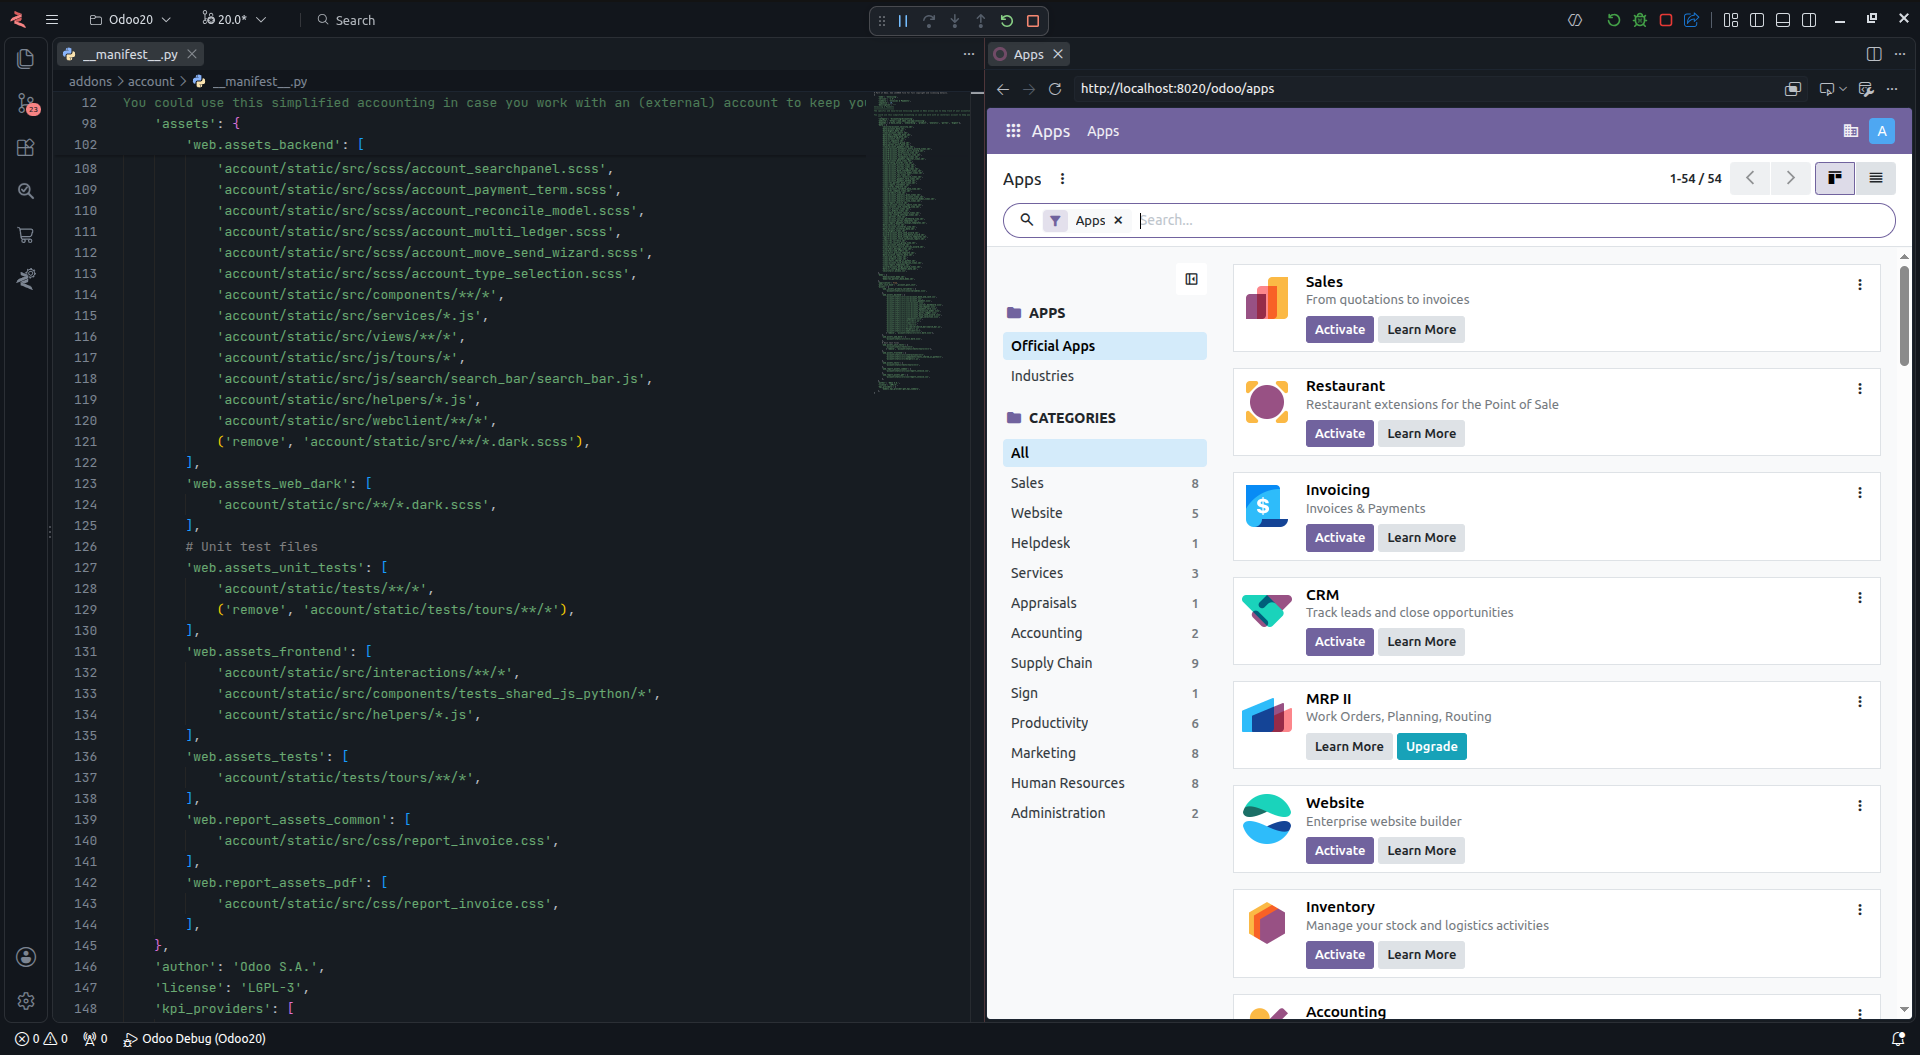
Open your running Odoo in a browser tab next to your code and check changes without switching windows. Open the Run menu arrow in the title bar and select Open in Browser to open Odoo there each time you run it. Open Browser in New Window puts the tab in its own window.
When you run Odoo it opens in the built-in browser by default, and you can turn that off in settings. The browser menu has tabs, zoom, find and device emulation, so you can check a change on a phone-sized screen too. Assista Coder can use the browser as well. It is called the Integrated Browser in the IDE.
Themes
Assista IDE includes the Assista Midnight (default), Assista Dark and Assista Light themes.